7 Easy Steps to Create Your DIY Mason Jar Hydroponic System
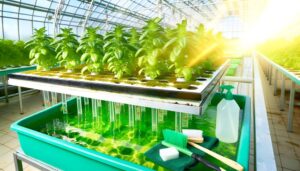
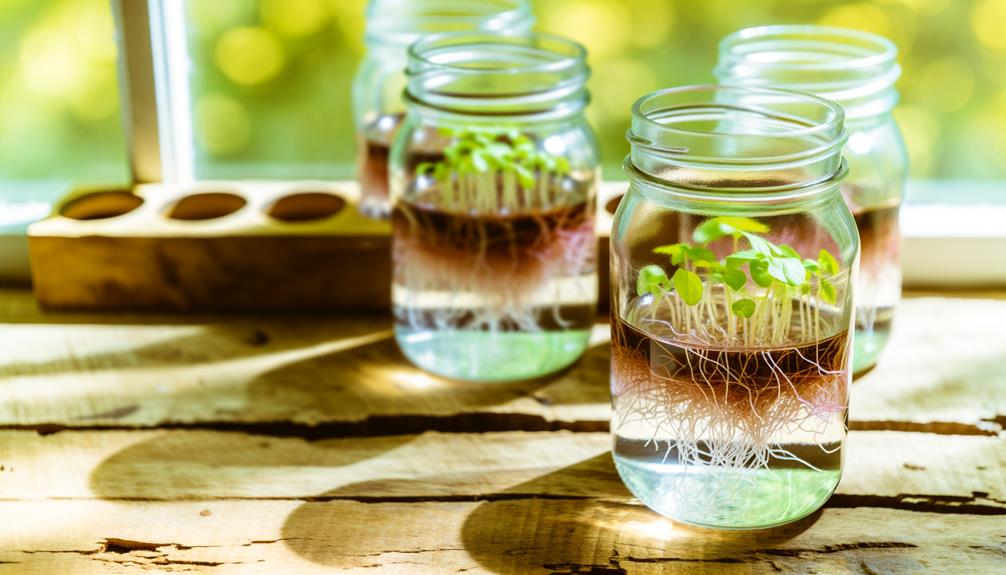
Creating a DIY mason jar hydroponic system is an efficient, cost-effective method to grow plants without soil. Begin with a thoroughly cleaned mason jar as your reservoir, fitting a secure net pot with an appropriate growing medium and hydroponic nutrient solution.
It's essential to maintain the nutrient solution at an ideal pH of 5.5 to 6.5 and guarantee proper root aeration. Position the jar in a well-lit area with stable environmental conditions.
Regularly monitor water levels and nutrient balances to prevent deficiencies and promote healthy plant growth. This system offers a fascinating glimpse into soil-free cultivation techniques.
Key Takeaways
- Clean and sterilize mason jars thoroughly before use to prevent contamination.
- Use net pots and growing mediums to securely anchor plants and support root growth.
- Prepare and maintain a balanced hydroponic nutrient solution with a pH of 5.5 to 6.5.
- Position mason jars in an area with adequate indirect sunlight or use grow lights for sufficient photosynthesis.
Gather Your Materials
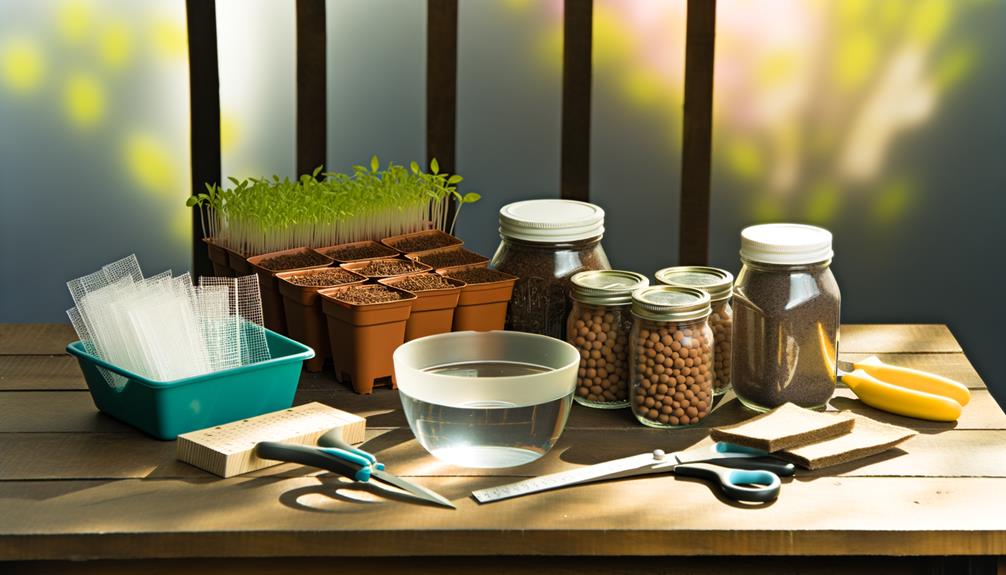
To begin constructing your DIY Mason Jar Hydroponic System, it is vital to gather all necessary materials, including mason jars, net pots, hydroponic nutrient solution, growing medium, and water pH testing kit.
Mason jars serve as the primary reservoir for the nutrient solution, while net pots hold the plants securely. The hydroponic nutrient solution provides essential minerals and nutrients required for plant growth.
A growing medium, such as clay pellets or rock wool, supports the plants' root structure. The water pH testing kit guarantees the nutrient solution remains within the ideal pH range of 5.5 to 6.5, which is important for nutrient uptake.
Collecting these materials beforehand streamlines the assembly process, enabling a seamless shift to the next steps.
Prepare the Mason Jar
Making certain the mason jar is clean and sterile is essential for preventing contamination and promoting healthy plant growth.
Begin by thoroughly washing the mason jar with soap and warm water, scrubbing to remove any residues. Rinse multiple times to guarantee all soap is eliminated.
For sterilization, immerse the jar in a solution of one part bleach to ten parts water for ten minutes. Rinse thoroughly with distilled water to remove any bleach traces. Alternatively, you can sterilize the jar by boiling it in water for ten minutes.
Allow the jar to air dry completely on a clean surface. This meticulous preparation step minimizes the risk of bacterial or fungal growth, creating a superior environment for your hydroponic system.
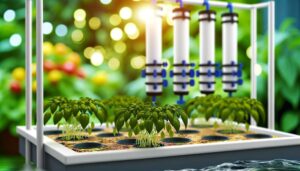
Set Up the Net Pot
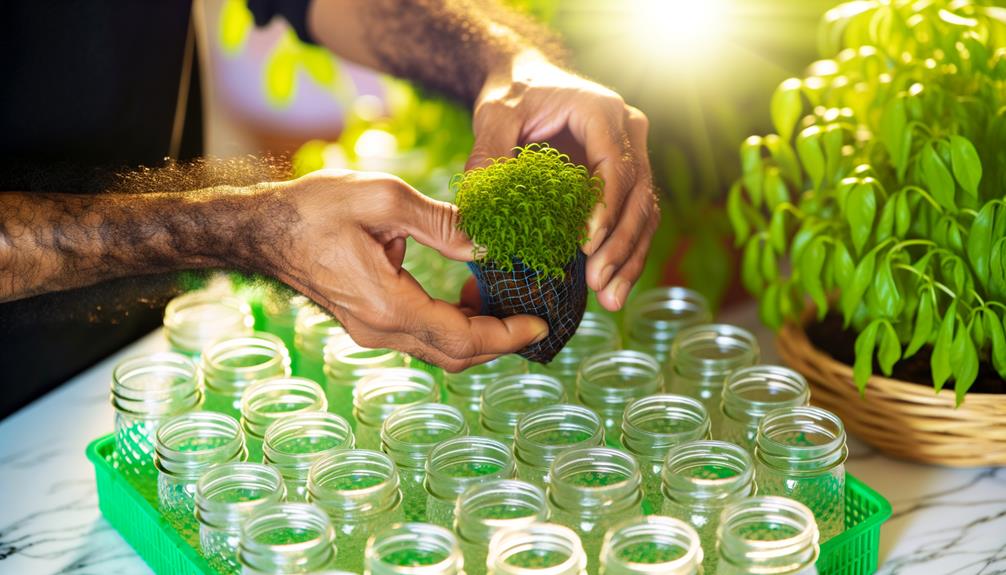
To effectively set up the net pot, one must first select an appropriate size that guarantees ideal root space while fitting securely within the mason jar's opening.
The chosen net pot should then be firmly secured to prevent any instability, which could affect the plant's growth and nutrient uptake.
Proper anchoring can be achieved through various methods, such as utilizing a custom lid or an adhesive material.
Choosing Net Pot Size
Selecting the appropriate net pot size is important for optimizing root aeration and nutrient uptake in a DIY mason jar hydroponic system. The chosen size directly influences plant health and growth efficiency.
Here are three significant factors to take into account:
- Root Space: Make sure the net pot provides sufficient room for root expansion. This prevents root crowding, which can inhibit nutrient absorption.
- Stability: Larger net pots offer increased stability for taller plants, reducing the risk of toppling.
- Oxygen Exchange: Adequate perforations in the net pot enhance oxygen exchange, essential for root respiration and overall plant health.
Securing the Net Pot
After selecting the appropriate net pot size, the next step involves securely positioning the net pot within the mason jar to guarantee perfect plant support and nutrient delivery.
Begin by creating an opening in the mason jar lid that precisely fits the net pot's diameter. This guarantees stability and prevents any movement that could disrupt root development.
Using a drill or a rotary tool, carefully cut the opening, guaranteeing smooth edges to avoid damaging the net pot.
Insert the net pot into the lid, guaranteeing a snug fit.
This secure placement is critical for maintaining the hydroponic system's structural integrity, allowing nutrient solutions to efficiently reach the plant roots, thereby fostering ideal growth and maximizing the system's innovative potential.
Mix the Nutrient Solution
Properly mixing the nutrient solution is critical for guaranteeing the ideal growth and health of your hydroponic plants. The nutrient solution provides essential minerals and nutrients directly to the plant roots, bypassing soil limitations.
To create an effective solution:
- Measure Concentrates: Use a precise digital scale to measure the appropriate amounts of hydroponic nutrient concentrates (A and B formulas).
- Dilute Properly: Mix the concentrates separately into distilled water, following the manufacturer's instructions for dilution rates.
- Check pH Levels: Utilize a pH meter to guarantee the solution maintains a pH range of 5.5 to 6.5, optimizing nutrient uptake.
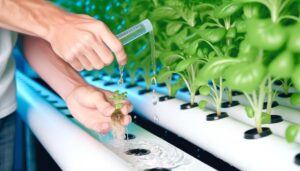
Insert the Plant
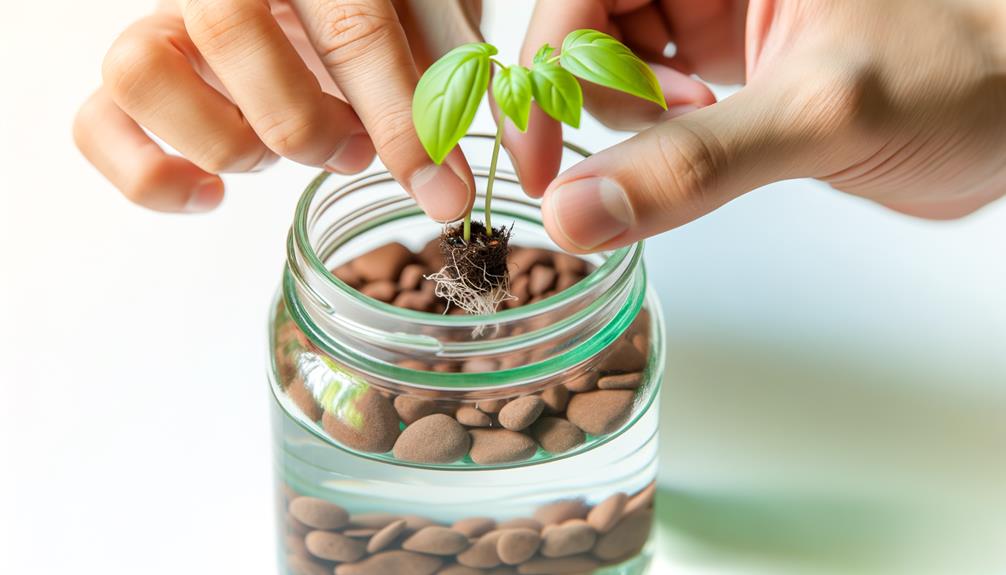
Inserting the plant into the mason jar hydroponic system requires careful attention to root placement to guarantee ideal nutrient absorption and growth.
Gently position the roots through the net pot while making sure they are evenly spread to avoid crowding.
Once the plant is securely placed, add the prepared nutrient solution until it reaches the base of the roots, facilitating immediate uptake of essential minerals.
Root Placement Technique
To guarantee ideal root development in your DIY mason jar hydroponic system, gently position the plant's root structure within the net pot, making sure that the roots are evenly distributed and have ample space for growth.
This careful placement fosters optimal nutrient absorption and oxygen exchange. Follow these steps for precise root placement:
- Root Inspection: Examine the roots for any damage or rot. Trim any unhealthy sections to promote vigorous growth.
- Even Distribution: Spread the roots uniformly around the net pot, ensuring they do not clump together, which can impede nutrient uptake.
- Depth Adjustment: Position the roots such that they touch the nutrient solution surface but are not submerged entirely, allowing adequate oxygen exchange.
This meticulous approach will greatly enhance the plant's overall health and growth potential.
Nutrient Solution Addition
Once the roots are properly positioned in the net pot, gradually introduce the nutrient solution into the mason jar, making sure that the roots are in contact with the liquid without being fully submerged.
This precise level of immersion is critical for peak oxygen uptake and nutrient absorption.
Utilize a nutrient solution specifically formulated for hydroponic systems, typically containing balanced proportions of macronutrients (nitrogen, phosphorus, potassium) and essential micronutrients (iron, manganese, zinc).
Monitor the pH level, maintaining it between 5.5 and 6.5, to guarantee nutrient availability.
Regularly check the solution's concentration with an electrical conductivity (EC) meter, aiming for a range of 1.0 to 2.5 mS/cm, depending on the plant species.
Replenish the solution periodically to sustain plant health and growth.
Position the Mason Jar
Guaranteeing ideal growth conditions, the Mason jar should be positioned in an area where it can receive adequate indirect sunlight while avoiding extreme temperature fluctuations. This placement is essential for optimizing photosynthesis and maintaining a stable environment for the hydroponic system.
Consider the following guidelines:
- Light Exposure: Place the jar near a window with filtered light or utilize grow lights to guarantee consistent, indirect illumination throughout the day.
- Temperature Stability: Avoid placing the jar near heating or cooling vents to prevent stress on the plants due to temperature swings.
- Humidity Control: Position the jar in a room with moderate humidity, ideally between 40-60%, to support healthy plant growth without fostering mold or mildew.
These steps will guarantee the Mason jar hydroponic system operates efficiently.
Monitor Water Levels
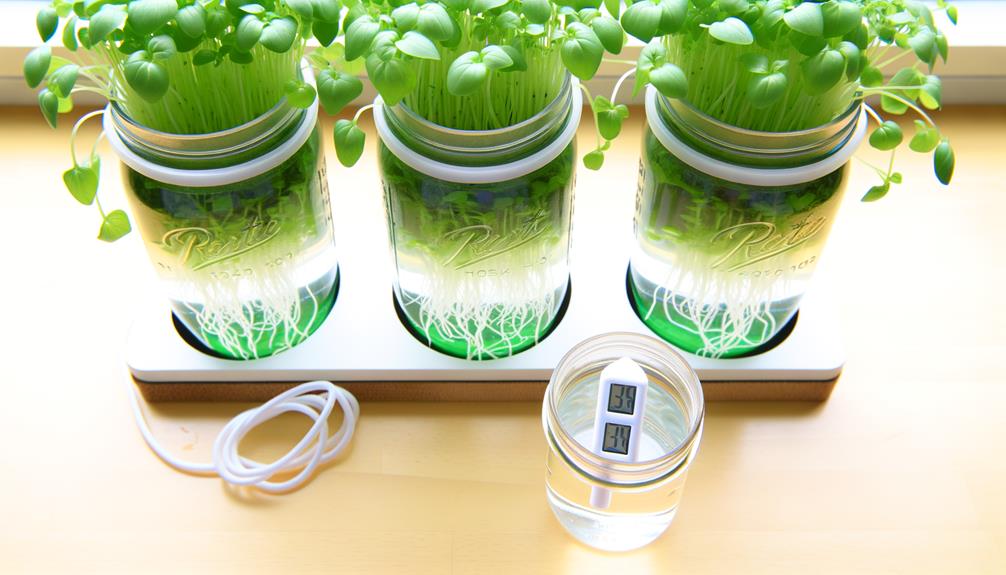
Regularly monitoring the water levels in your Mason jar hydroponic system is essential for maintaining ideal nutrient delivery and preventing root desiccation.
Hydroponic systems rely on a delicate balance of water and nutrients, and fluctuations can adversely affect plant health. To guarantee peak growth, check the water levels daily, ensuring they cover the root zone but do not oversaturate it.
Use a calibrated measuring device to maintain a consistent water level, ideally just below the net cup containing the plant. This practice prevents oxygen depletion while facilitating nutrient uptake.
Additionally, mark the jar with a water level indicator for quick reference. By meticulously monitoring water levels, you can guarantee that your hydroponic system operates efficiently and your plants thrive.
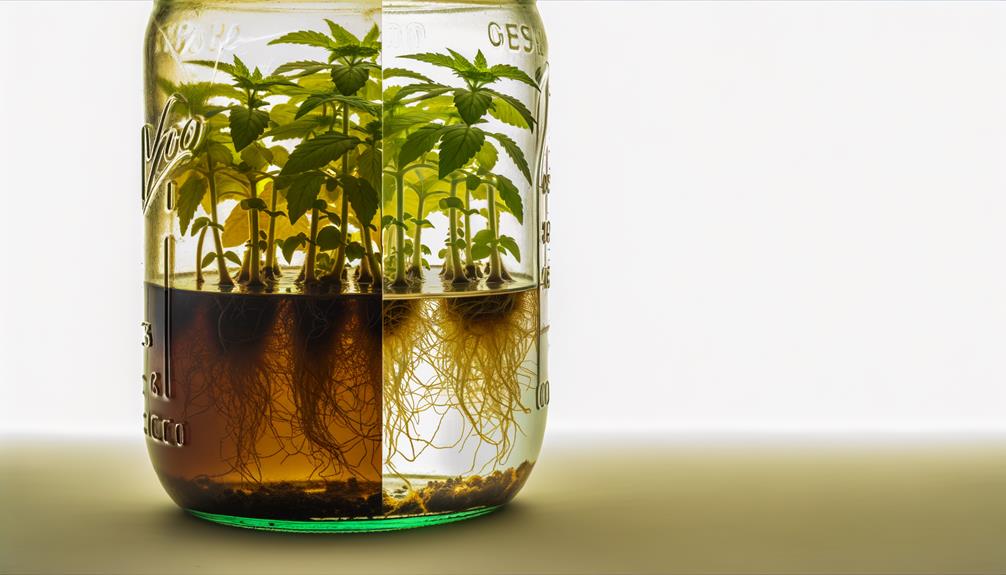
Maintain Your System
Maintaining your Mason jar hydroponic system involves not only monitoring water levels but also guaranteeing the cleanliness and functionality of all components to promote ideal plant health and growth.
Regular maintenance is vital for preventing nutrient imbalances and microbial contamination. Here are three key practices to make sure your system operates at its best:
- Clean the Mason Jar: Periodically clean the jar to remove algae and biofilm buildup. Use a mild solution of diluted bleach, followed by thorough rinsing to avoid chemical residues.
- Inspect Roots and Plants: Regularly check plant roots for signs of rot or disease. Healthy roots are white and firm, while any discoloration or mushiness should be addressed immediately.
- Nutrient Solution Replacement: Replace the nutrient solution every two weeks to maintain balanced nutrient levels and prevent the growth of harmful pathogens.
Troubleshooting Tips
When encountering issues with your Mason jar hydroponic system, a methodical approach to troubleshooting can help identify and resolve common problems efficiently.
Begin by checking the nutrient solution's pH; an ideal range of 5.5 to 6.5 promotes nutrient uptake.
If yellowing leaves appear, it may indicate nutrient deficiencies or imbalances, warranting a review of your nutrient mix proportions.
Insufficient oxygenation can be another culprit; verify the roots receive adequate aeration, possibly by adjusting the air pump or adding an airstone.
Algae growth, often a result of light exposure, can be mitigated by covering the jars with opaque material.
Conclusion
In the spirit of ancient Babylon’s Hanging Gardens, the creation of a DIY mason jar hydroponic system ushers in a modern renaissance of indoor gardening. This simple yet effective method allows anyone to cultivate herbs and greens without the need for soil, making it perfect for urban dwellers with limited space. For those looking to scale up their efforts, a DIY drip DTW hydroponics system offers a more advanced approach, ensuring plants receive a steady supply of nutrients while excess water is efficiently drained away. Combining innovation with tradition, these systems bring the lush beauty of hydroponic gardening into any home.
This method, grounded in scientific principles, leverages nutrient solutions to sustain plant growth without soil.
By meticulously assembling materials, preparing the jar, and maintaining the system, one can foster a thriving indoor ecosystem.
This approach not only enhances environmental sustainability but also brings the marvels of nature into contemporary living spaces.